Back to HOME
Army Telegraphs-1

Telegraph stamps of the World

Click here for a site-map.
Army Telegraphs-2
Army Telegraphs 1 Site Map. Army Telegraphs 2
Übersetzen sie
WORKING
Traduisez
Traduca Traduzca


1899-1902 Book by Liet.-Colonel R. L. Hippisley on British Army telegraphs of Boer War.


size-up
size-down
Comments

Pink highlighting indicates a possible date conflict.
You can mark a row by clicking on it and 'un-mark' it by clicking on it again.
You can see images by clicking the number under the 'Qty' heading.

This listing is based on the work of Peter Langmead (who built on the work of Commander Brown) and has been updated by Richard Stroud, Alan Drysdall and Andrew Higson.

I have added a column for 'Earliest' because I think it is important.
In most cases at the moment it is the same date as 'Last-known' because I only know one example.
There is therefore plenty of opportunity to extend the known range if anyone wants to send me a scan (300+dpi).
I will happily update the record, display the item and give credit for it.

(Second) Anglo-Boer War 1899-1902.

For an in-depth description of the Telegraph and Telephone operations see History of the Telegraph Operations during the war in South Africa, 1899-1902 by Liet.-Colonel R. L. Hippisley, C.B., R.E. (PDF)
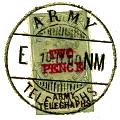
GB Army Telegraph stamps were used initially in Cape Colony, Natal and Transvaal, but by the time they got to the Transvaal and Orange Free State they had just about run out of their Army Telegraph stamps and used what was available.
The book mentioned above gives a list of offices with opening and closing dates, it makes no mention of the telegraph codes used, or even the stamps.
Associating the codes with office names/locations is sometimes based on hard evidence, but has also been done by guesswork.
The evidence shows that either the list is incomplete, and/or some guesses are wrong.
Keep in mind that Hippisley left in 1902, before many of the offices closed, and probably before some opened.

The book contains many maps that could be useful matching codes to locations, and many thanks to the National Library of Australia for making this book readily accessible.
Unfortunately though, the maps were scanned at fairly low resolution and saved as jpeg images before being embedded in the PDF. This makes some hard to read and some virtually illegible.
I have tried to reduce the jpg artifacts and clean up the images a bit to make them better. For 11 of them (13,16,18,25,36,45,58,59,61,64 and 66) I have doubled the size, but for some they are still almost useless.
I didn't even try with the last 7. If in doubt, look at the PDF. Perhaps someone with an original copy of the book might help out.

Scale: I think that the maps were originally scanned at 150dpi and were added to the PDF at half that.
I displayed the pdf at 150% scale and did a screen-capture. If correct that would give me 150 x 1.5 / 2 px/inch, or 112.5dpi which seems about right for ones I have checked.

On page 85 Hippisley starts a table of diagrams.
Click on the diagram number to view image.

Diagram. Description.
1 The advance to Modder River; operations at Rensburg.
2 Lord Roberts' march to Bloemfontein.
3 Restoration of lines at Norvals Point and Bethulie.
Operations in the Free State. First march to Thaba 'Nchu.
Operations of 3rd and 8th Divisions at Dewetsdorp.
March of the Cavalry and 11th Divisions to Dewetsdorp
4 The advance northward from Kimberley.
Lord Methuen's march to Hoopstad, Bothaville, and Kroonstad.
5 Lord Roberts' march to Kroonstad.
Parallel march of Ian Hamilton, Thaba 'Nchu to Kroonstad.
Lord Roberts' march from Kroonstad to Pretoria.
March of the Cavalry from Kroonstad to Pretoria.
6 Operations of Hunter, Rundle, Clements, and Paget in Orange River Colony.
7 Siege of Ladysmith.
8 Relief of Ladysmith.
9 The Elandslaagte position.
10 Advance to Helpmakaar, Biggarsberg, and Newcastle.
The march to Utrecht. The advance to Volksrust.
11 The advance to Standerton.
12 Junction with Lord Roberts.
The advance eastward till junction with Buller.
13 March to Barberton, Lydenburg, and Komatiepoort.
14 Operations north of Pretoria.
15 Lord Kitchener's Prieska expedition.
16 French's operation eastward to Piet Relief.
17 Plumer's march to Pietersburg.
Operations under Bindon Blood.
18 Operations under Bindon Blood.
19 Operations in west of Orange River Colony.
20 Operations near Edenburg.
21 Operations in Orange River Colony; October 1901 to February 1902.
22 Operations in Orange River Colony; October 1901 to February 1902.
23 Operations under Plumer near Wakkerstroom.
24 Operations under Bruce Hamilton, Ermelo and Vryheid.
25 Operations under Ian Hamilton in Western Transvaal.
26 Skeleton map of blockhouse lines.
27 Blockhouse line, Standerton to Ermelo.
28 Blockhouse line, Ventersdorp to Klerksdorp.
29 Blockhouse line, Buffelsvlei to Rietvlei.
30 Blockhouse line, Lichtenburg to Mafeking.
31 Blockhouse line, Ventersdorp to Tafelkop.
32 Blockhouse line, Tafelkop to Naauwpoort West.
33 Blockhouse line, Potchefstroom, Scandinavia Drift, Rhenoster.
34 Blockhouse line, Frederickstad, Naauwpoort West, Breedtsnek.
35 Blockhouse line, Wakkerstroom to Piet Retief.
36 Blockhouse line, Norvals Pont, Smaldeel, Winburg.
37 Blockhouse line, Smaldeel to Virginia.
38 Blockhouse line, Virginia to Kroonstad
Diagram. Description.
39 Blockhouse line, Kroonstad to Viljoen's Drift.
40 Blockhouse line, Wolvehoek to Heilbron.
41 Blockhouse line, Bloemfontein to Sannah's Post.
42 Blockhouse line, Sannah's Post to Zwartlaagte.
43 Blockhouse line, Springfontein to Bethulie.
44 Blockhouse line, Kroonstad to Bethlehem.
45 Blockhouse line, Bethlehem to Harrismith;
Blockhouse line, Rivier Drift, Eland's River, Majoor's Drift.
Blockhouse line, Harrismith to Oliviers Hoek Pass.
Blockhouse line, Harrismith to De Beer's Pass.
46 Blockhouse line, Brindisi to Bethlehem.
47 Blockhouse line, Vet River to Slootkraal.
48 Blockhouse line, Slootkraal to Bloemhof.
49 Blockhouse line, Vet River to Boshof.
50 Blockhouse line, Kroonstad Diamond Mine, Klip Drift.
51 Blockhouse line, Diamond Mine, Bothaville, Commando Drift.
52 Blockhouse line, Bothaville Junction to Coal Mine Drift.
53 Blockhouse line, Heilbron to Frankfort.
54 Blockhouse line, Frankfort to Vrede.
55 Blockhouse line, Harrismith to Olivier's Pass.
56 Electric fencing; Jagersfontein, Bethulie, Edenburg locals.
57 Electric fencing; north of Kroonstad.
58 Blockhouse line, Gaberones to Mafeking. Blockhouse line, Maritzani to Kimberley.
Blockhouse line, Kimberley to Orange River. Kimberley and Warrenton locals.
59 Blockhouse line, Orange River to De Aar. Blockhouse line, De Aar to Beaufort West.
Blockhouse line, De Aar to Naauwpoort.
60 Blockhouse line, Naauwpoort to Norvals Pont. Blockhouse line, Naauwpoort to Rosmead.
Blockhouse line, Rosmead to Stormberg. Blockhouse line, Bethulie, Bombani, Weltevreden.
61 Blockhouse line, Bethulie, Aliwal North, Herschell.
62 Blockhouse line, Victoria Road to Williston.
63 Blockhouse line, Calvinia to Lambert's Bay.
64 Natal Telephone Exchange System.
65 Blockhouse line, Dundee to Vryheid. Blockhouse line, Dundee to Nqutu.
Vryheid Telephone Exchange.
66 Telephone Exchange, Bloemfontein.
67 Telephone Exchange, Harrismith.
68 Telephone Exchange, Winburg.
69 Telephone Exchange, Bethulie.
70 Telephone Exchange, Aliwal North.
71 Telephone Exchange, Kroonstad.
72 Telephone Exchange, Heilbron.
73 Telephone Exchange, Ficksburg and Ladybrand.
74 Telephone Exchange, Mafeking and Vryberg.
75 Vibrator System at Modder River.
76 Telephone Exchange, De Aar.
77 Telephone Exchange, Carnarvon, Victoria West, Victoria Road.
78 Telephone Exchange, Burghersdorp.


Comments, criticisms, information or suggestions are always welcome.

Emale

Please include the word 'Telegraphs' in the subject.


Last updated 2nd. June 2023

©Copyright Steve Panting 2012/13/14/15/16/17/18/19/20/21/22/23 except where stated.
Permission is hereby granted to copy material for which the copyright is owned by myself, on condition that any data is not altered and this website is given credit.


Valid XHTML 1.0 Transitional  Valid CSS!