| Übersetzen sie |
WORKING
|
Traduisez |
| Traduca |
Traduzca |
Pitfalls with Scanners.
For economic reasons, scanners are designed to be suited to the needs of most potential customers at an acceptable price.
Most people simply want a scanner to copy documents, family snaps etc., with no particular need for accuracy and limited need for accurate colour even.
Typically they come bundled with software which is again suited to the needs of the majority of people.
For some purposes though, accurate colour and size is important, so is the aspect ratio. With bundled software there are genarally a lot of options
which have been preset with a lot of assumptions. I generally disable all automatic features that I can get access to.
For my purposes, I generally scan at 600dpi, straighten the image, reduce to 300dpi, crop it and save as a jpg file.
Be aware that a jpg file uses compression that sacrifices some image quality as a tradeoff for the storage-requirement saved and speed to load.
When saving as jpg/jpeg, there is generally a place to specify the degree of compression.
From Paint Shop Pro for example, when saving as jpeg, there is an Options button at bottom-right that allows you to set 'Compression Factor' (mine is set to 20).
If you cannot do what you need with the bundled software, be aware that there is some good free software available, see below.
Another problem is size / aspect ratio.
Scanners generally glibly state a range of resolutions that they can handle, mine for example lists: 75, 100, 150, 200, 300, 400, 600 or 1200dpi.
be aware however that these are only approximate. The accuracy of the figures is not even in any of the specifications that I have seen !
Okay, don't try this at home, here are a couple of images of a reasonably modern scanner (Canon Lide 110) with the distracting bits removed:
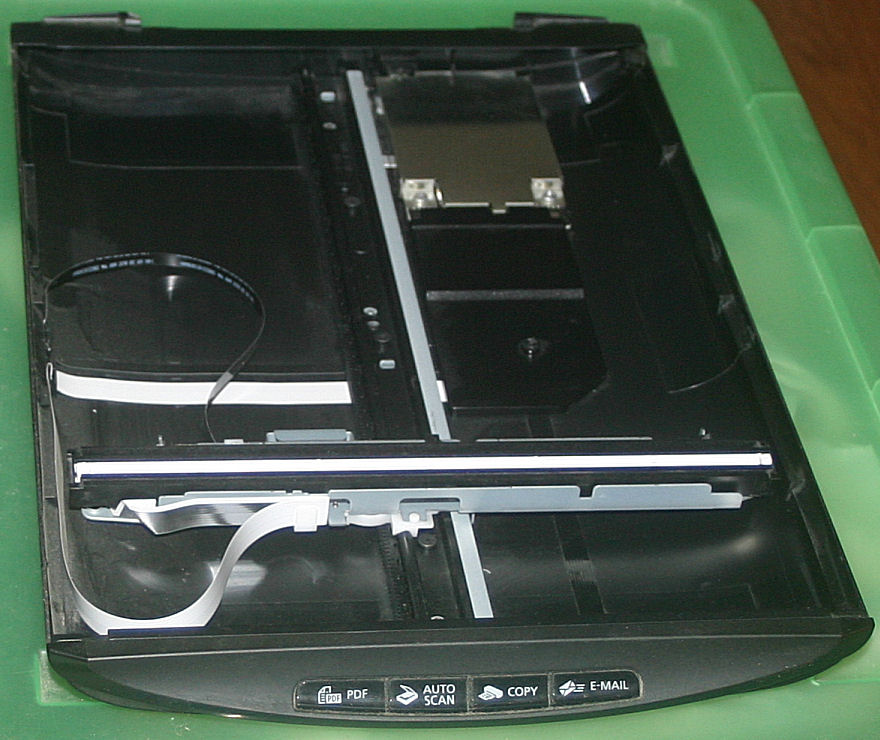
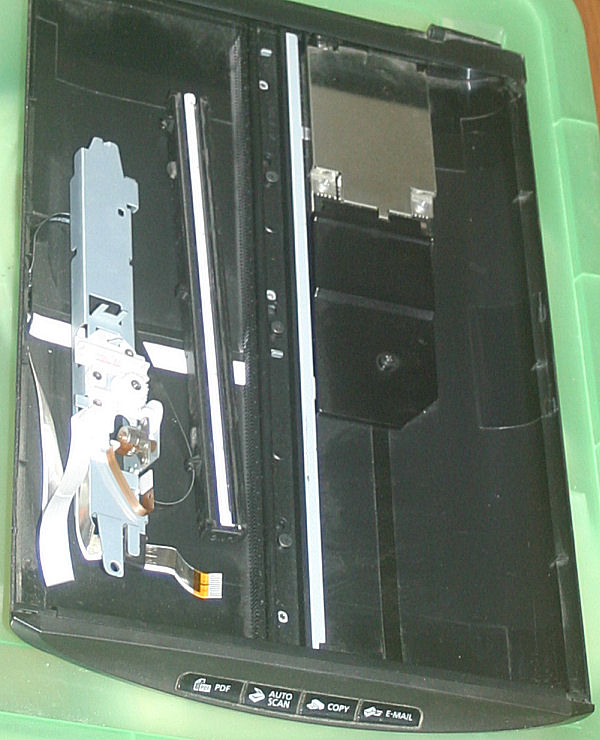
On the left is just with the top removed, on the right is shown, left to right, the 'crawling mechanism' (turned over), optical strip, plastic track and interface electronics box.
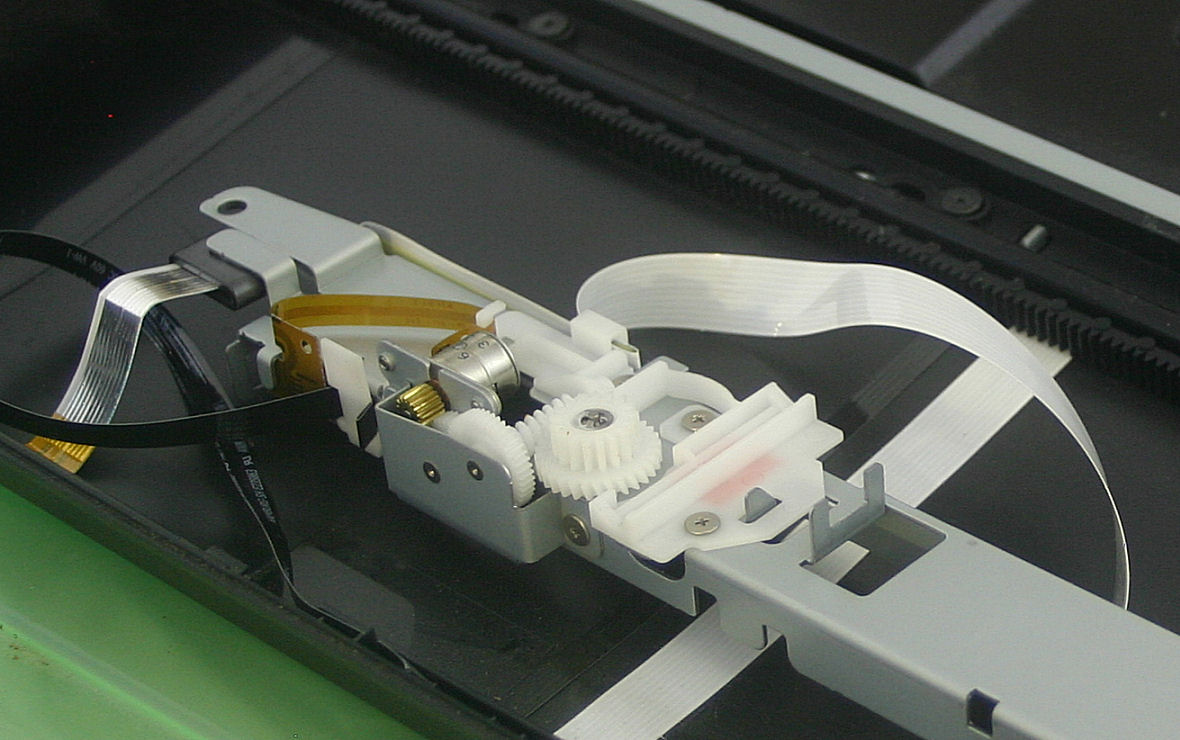
A closup of the crawling mechanism showing stepper-motor and gear-train, including a worm gear, with the last that engages with the black plastic track shown behind it.
The silver and gold ribbon on the left would normally plug into the optical strip. Sources of y-axis tolerance would be a matter of machining accuracy, temperature variation and possibly wear.
The x-axis tolerance is down to the accuracy of the optical strip, together with temperature. Aspect ratio, x-dpi/y-dpi depends on whether they did their sums right, and the x and y tolerances.
This type of mechanism has the potential to be quite accurate, though it would be reassuring to see resolution and aspect ratio tolerances in specifications, as well as an aid to making decisions.
Beware though of old scanners that use belts as they are more likely to be a source of trouble since their length can change with belt-tension, temperature and age.
That will have a knock-on affect on the aspect ratio. If you want to check the aspect ratio on your scanner, scan a decent ruler at fairly high resolution aligned parallel to the front,
then turn it at right angles and scan again. Use some image editing software to compare them with each other. They should be the same length in pixels, if not, you can easily work out the error.
If you are wondering why I have a dusty scanner in bits, it's actually an interesting story.
I started getting problems with it. It kept saying that the scanner was locked and I should unlock it. It was not locked. It actually has no sensors to detect the position of the lock.
I took it to the local Cannon center and it worked fine on their machine, but back at home it gave problems. To cut a long story short, the problem was sensitivity to the 5v on the USB cable.
All of its power comes from the USB cable and some USB sockets gave enough and some did not. USB-3 should be better.
In the end I got a powered USB hub which fixed it, but not before I had bought a new Lide 120 scanner. It is quite possible that other scanners running off the USB port may also get problems.
Uses of a scanner.
Apart from the obvious uses, like copying or preparing illustrations for websites and sales purposes, a scanner, coupled with
appropriate software makes it easier to measure sizes and the guages of perforations.
It is best to scan initially at a fairly high resolution, say 600dpi (dots/pixels per inch). Generally you will then need to rotate it a little to line it up with the x/y axes.
I normally use Paint Shop Pro (PSP), but at least basic functions should be available in all decent image maniputation programs,
though in the high-end ones they may be hard to find without a lot of time spent in familiarization with them.
In PSP, I find the easiest way to measure what I want is with the cropping tool. You do not have to actually crop anything,
but assuming that you have checked View > Palettes > Tool Options, you can select an area around what you want to measure,
move top, bottom and sides as you wish and read off the dimensions in pixels at the top.
If you have scanned the image at 600dpi, then simply divide width and/or height by 600 to get the sizes in inches.
That can be multiplied by 25.4 to get it into millimeters.
To measure perforation guage, this is defined (at least in Britain/Europe) as the number of perforations in 20mm.
At 600dpi, 20mm equates to 472 pixels width. A selection box of 472 x 472 can be moved around to judge the guage,
though you may need to use 236 pixels and double the result.
Generally it will not be a whole number. With older stamps, the result may vary with where you measure it since they were not always evenly spaced.
Be aware that stated perforations in catalogues are generally rounded, and/or traditional values quoted in the days when the nearest ½ was good enough.
11¾ is often given as 12 for example.
Useful links.
Image editing software often includes a scanner interface. That includes Irfanview (for the novice) or Gimp (for the professional),
or Corel Paint Shop Pro (intermediate) that I normally use (on Windows 7, but it can also work with Wine under Linux).
On Linux, Gimp is usually used. It is very powerful, but can be a bit cumbersome because of the vast array of options.
Paint Shop Pro usually comes as version 7 or Version X that needs a bit more work to avoid nagging.
The later version has more features, but cannot save files as JP2 files, though it can read them.
Sorry, I can't help with Apple, I have never owned one.
If sending images, please do NOT embed them in pdf documents, they generally cannot be extracted without loss of quality.
If embedded in a word document, since a docx file is actually a customised zip file, they can have the extension changed to 'zip' and
then be unzipped. Images can be found in the 'media' subdirectory.
Comments, criticisms, information or suggestions are always welcome.

Please include the word 'Telegraphs' in the subject.
Last updated 20th. September 2021
©Copyright Steve Panting 2012/13/14/15/16/17/18/19/20/21 except where stated.
Permission is hereby granted to copy material for which the copyright is owned by myself, on condition that any data is not altered and this website is given credit.

