| Back to HOME |
I am not sure when this seal was introduced, the earliest dated example I have is 12/4/1880.
The influence here may be the other way around. Earlier ones tended to have a 2cm stamp size rather than spacing.
Note the fleur de lis in the crown, background and lettering.
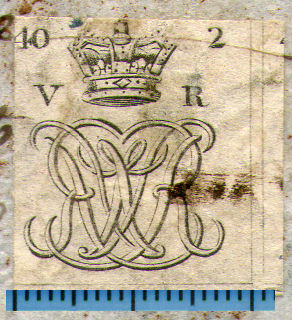
George III (on a will dated 8/12/1784) with 2cm stamp width and Victorian on an 1856 document with 2cm stamp size.
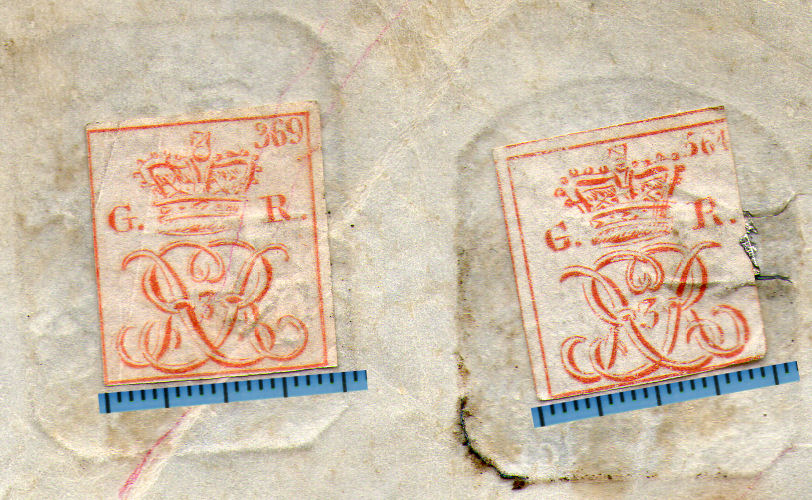
On an Irish document of George III (date torn off), with approx. 2cm spacing and a colour not too different from the penny red.
 |
 |
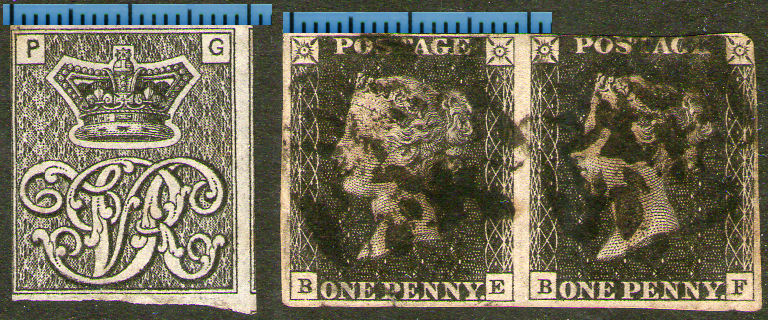
| Imperf. positioning. | Perf. 16 positioning. |
The stamps were designed and the plates were produced by Bacon & Petch, engravers and printers of bank notes.
The stamp-size guidance was "About the size of an inch square would suffice" (Philbrick & Westoby page 52) the Government provided the paper.
There is a two-volume set of books by E. D. Bacon written in 1920 about the history of stamp production by Perkins, Bacon & Co.
These are available at philatelicsannex.org. Pages 58, 59, 121 - 133 and 163 gives a lot of information about the perforators.
After taking into account the sheet size and the area needed for instructional markings, the "allowed area" left for the postage stamps was 9 5/8" by 18 1/4" (244 mm by 464 mm).
The sheets of paper used were watermarked with one small crown per stamp.
What is important to note though, is that the stamps were expected to be cut from the sheet with scissors.
Accuracy requirements were simply a matter of getting them in the space provided in approximate alignment with the watermarks.
Having said that, the accuracy of placement achieved was fairly good (some of the time).
Though scissors were not rapidly abandoned.
Because of the poor alignment of the earliest plates used, though the top left stamp might be aligned, the bottom right could be a well out.
More examples at philately.ttrr.org
Later plates were of course laid down much more carefully with the aid of a 'ratchet' machine to provide sheets more suitable for perforating.
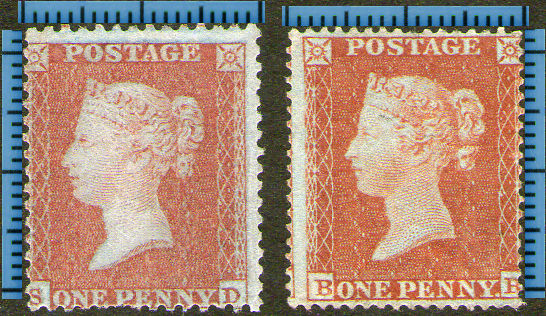
These are perhaps fairly typical Perf. 14 and Perf. 16 stamps.
Note though that the Perf.14 stamp is taller. They both have 3 extra perfs vertically, but the guage 14 needs more space for 3 perfs.
Stamps from 32 1d plates and 3 2d plates were perforated with both guages, one of the reasons for poor alignment of the perforations to the stamps.
Nearly all British postage stamps were comb-perforated, the only line-perforated stamps I know of were about half of the King George V, 1924 British Empire Exhibition stamps.
According to Stanley Gibbons, All perforating of postage stamps was done at Somerset House until 1880.
Though there had been a few trials, the first perforated postage stamps (for fiscals see below) issued in earnest were guage 16 in February 1854.
These were followed by some guage 14 in January 1855.
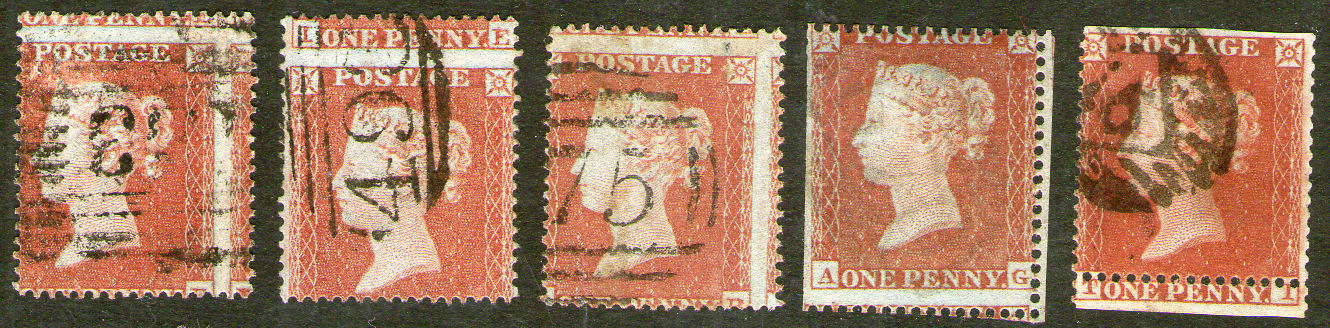
I am sure that in the early days, to distinguish between the two types the easiest way was to simply to count the teeth along the bottom edge.
I believe that the spacing of the stamps on the plate was about 0.8 inches horizontally, but due to shrinkage of the paper after drying, the measurement was more like 20mm.
All well and good until you get something like these, or even foreign stamps that were starting to be perforated.
As long as all stamps are the same shape and size, you don't even need units, but there came a time when units were needed.
The literature had already assigned 14 and 16 as the 'sizes' of the first stamps, to be compatible the easiest units were the number of holes (or teeth) to 2cm.
The distance between vertical columns is 2cm, it is not 0.8 of an inch, although close. Measuring strips of 5 or 6 stamps shows this clearly.
So it all comes down to why were the stamps laid down with that spacing in the first place?
David Napier & Sons did not choose 2cm because they liked metric (I presume), they needed to fit the existing stamps.
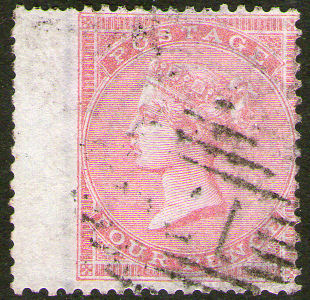
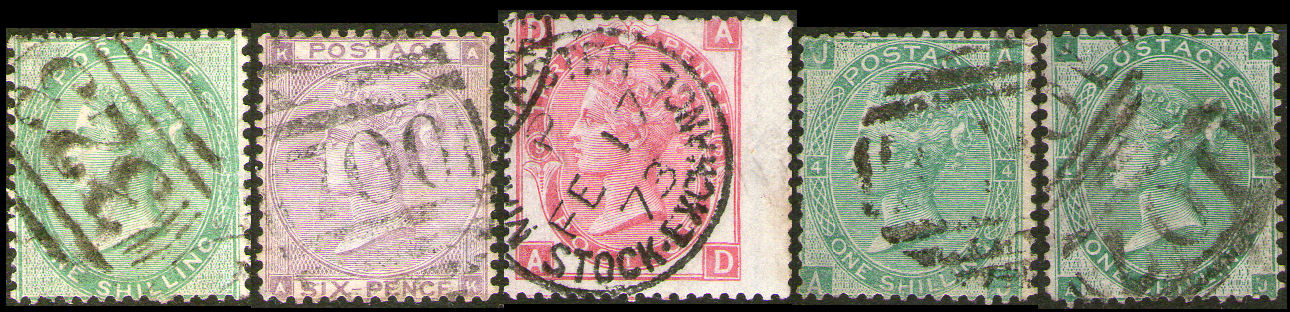
For those still wondering, the four pence is a Perf. 14 wing-margin example (one stamp in 3 in the sheet, similar ones from 1855)
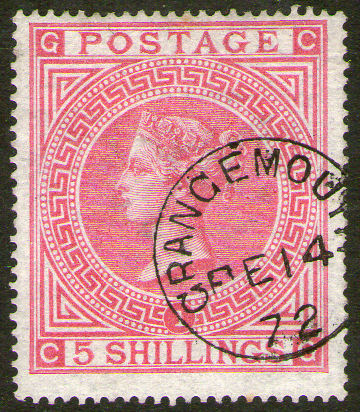
and the five shilling is perforated the same as the two stamps shown below (from 1867).
The perforation gauge was invented by a Dr Magnus, whose work was published in Le Timbre-Poste in 1867. Originally it was called an odontometer (literally 'tooth measurer').
Once standards were laid down it was better for all concerned to comply with them so that standard perforators could be used on standard sized stamps, printed on standard sized paper.
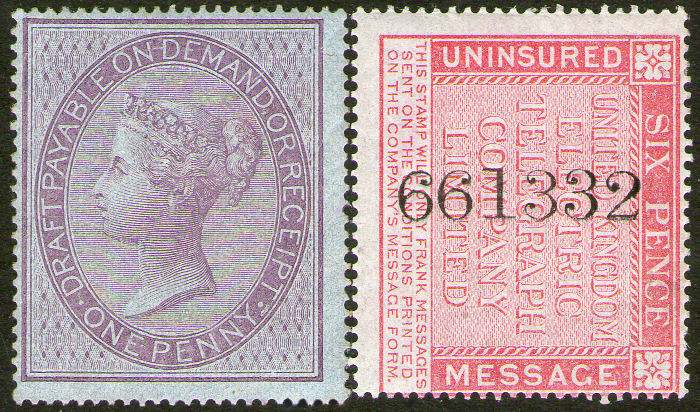
Quoting Stanley Gibbons' Specialised GB Catalogue regarding Receipt and Draft Stamps (1853-57),
"Perforation. All stamps were perforated 15½ x 15 at Somerset House on two machines specially constructed by Napier for these large format sheets.
These were the first perforated stamps to appear, predating the official perforation of the postage issues by nearly four months."
From late 1861, De La Rue provided stamps for the United Kingdom Electric Telegraph Company. These were perforated at Somerset house using the same guage.
Because of this they are the only Private Telegraph Company to have comb-perforated stamps (I think).
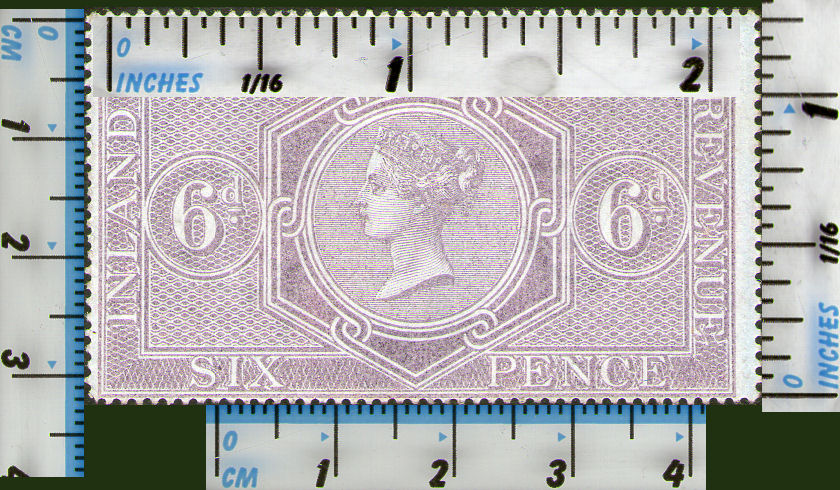
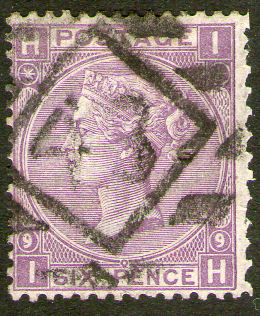
I am using here a 6d stamp because the larger size allows for greater accuracy of measurement.
It is the same size as the £5 orange Post Office Telegraph stamp and with the same perforations.
There is a fairly good fit with 31 to 40mm (Perf 15½), and another fairly good fit of 29½ in 1½ inches, and 32 in 1 5/8 inches.
If we wanted to use Imperial units this would have to be approximately 19.66667 or 19.692, say 19.7 holes per inch.
There is a fairly good fit with 19 to 25mm (Perf 15.2), and another fairly good fit of 12 in 5/8 of an inch, and 24 in 1¼ inches (the same).
If we wanted to use Imperial units this would have to be approximately 19.2 holes per inch.
Mostly this is seen as a 'short A-row' stamp.
If when the first row was perforated, the positioning was wrong, the machine was adjusted by a row or two so that the rest of the sheet would not have the same problem.
If the last row, the 'T' row, was fed in first then that row may be long or short. 5 sheets were normally perforated per batch.
An example of a long 'A' row stamp can be seen in the pair of 3d Bonelli's with two sizes of 'THREEPENCE' illustrated by both Hiscocks and Langmead & Huggins.
Another aberration that I have so far only seen on A-row stamps double-perforation, where the vertical perforations are doubled.
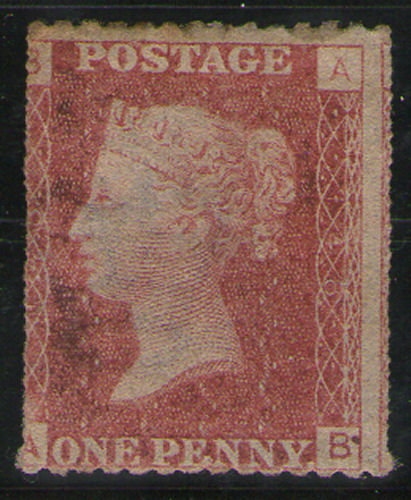
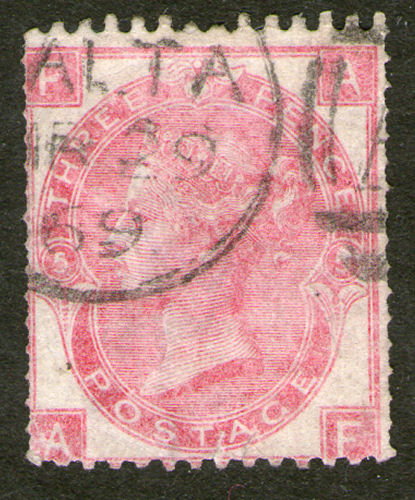
Penny red (plate 148) SG spec. G1k, only priced used and 3d (plate 5) SG spec. J30d used in Malta, unpriced used or unused.
 |
 |
 |
 |
 |
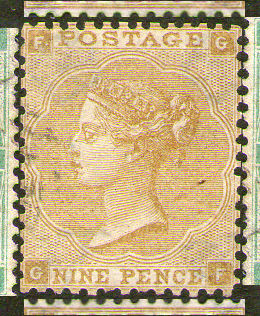 |
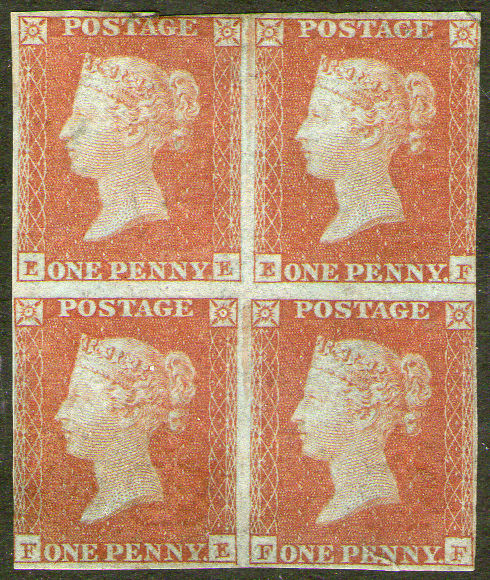
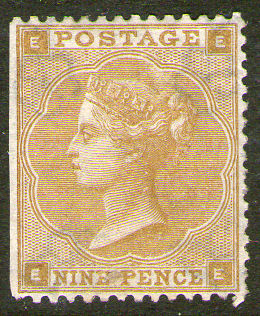
Early GB stamps were arranged into 'panes' on the sheet. this meant that some stamps had 'wing-margins'.
Over the years, many of these wing margins have been cut off like the 9d lettered 'EE' above.
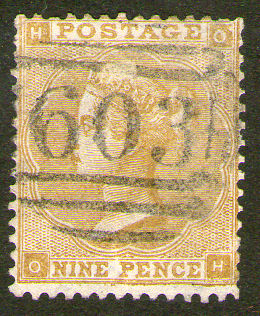
Again, for various reasons, many were subsequently 're-perfed'. Sometimes this was done very crudely and are easy to spot.
Sometimes they are more professional and so a knowledge of which stamps should have wing margins can be helpful.
The first series of the surface-printed did not have check letters in the corners, but still had wing margins.
For these, you can only look carefully or put a known genuine stamp against it to compare the perforations as shown with the last stamp.
The last stamp has been re-perfed on two sides, even though it never had a wing margin! Some people only like well centered stamps.
The check letters at the bottom left (and top right) indicate the row of the stamp, lettered 'A' through 'T' down the sheet.
The bottom right (and top left) letters indicate the column of the stamp and run from 'A' to 'L'.
Stamps with the 'Emblems' and 'Spray' watermarks (3d, 6d, 9d, 10d, 1s and 2s) had each row divided into 3 groups of 4 stamps.
That meant wing margins on stamps having 'D', 'E', 'H' or 'I' in the bottom right corner.
Stamps with the 'Garter' watermark (4d and 8d) had the rows divided into 2 groups of 6 stamps.
That meant wing margins on stamps having 'F' or 'G' in the bottom right corner.
The later 'Crown' watermarked stamps and higher value stamps did not have wing margins.
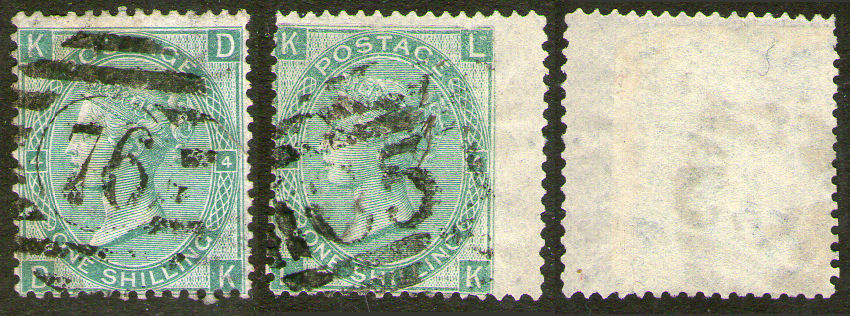
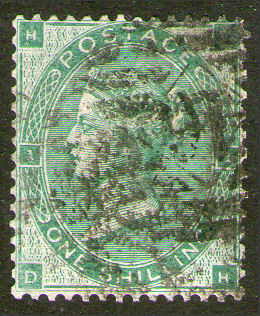
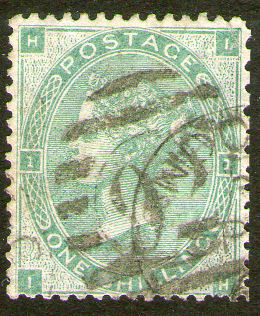
Here we have two 1s stamps with 'Emblems' watermark and 'K' in the bottom right corner.
Which one has been 'doctored'?
This demonstrates clearly that some 'doctors' are more skilled than others.
If it was not for the fact that neither stamp should have a wing margin I probably would never have looked close enough to see what had been done
The back is smooth to the touch, though holding it up to the light shows the overlapping area.
| Back to HOME |
Last updated 7th. March 2023
©Copyright Steve Panting 2012-2023 except where stated.
Permission is hereby granted to copy material for which the copyright is owned by myself, on condition that any data is not altered and this website is given credit.
![]()